Config TFT_eSPI with PlatformIO
While I'm developing a project with a TFT screen, and drive it with TFT_eSPI library, I found that the configuration of the library is not so easy. So I write this article to record the configuration process.
TFT screen data sheet
The screen shows as below:
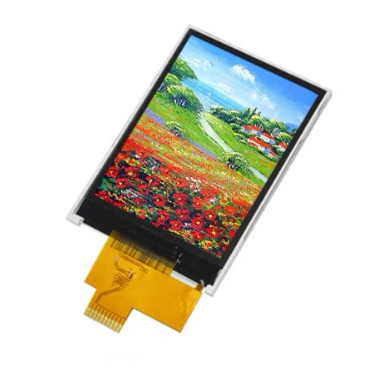
Specification:
- 2.4 inch TFT LCD
- 240x320 resolution
- 4 wire SPI interface
- dimension: 42.72x60.26X2.4mm
- display area: 37.42x49.66mm
- backlight: 4 white LED, 60mA
- 3~3.3V power supply
- power consumption: 0.22W
- operating temperature: -20~70C
- storage temperature: -30~80C
- viewing angle: 12 o'clock
- driver IC: ST7789
pin define as below:
| # | Name | Description |
|---|---|---|
| 1 | GND | Ground |
| 2 | RESET | reset |
| 3 | SCL | time |
| 4 | D/C | data |
| 5 | CS | chip selection |
| 6 | SDA | data |
| 7 | SDO | SPI Data out |
| 8 | VCC | VCC 3\~3.3C |
| 9 | A | LED A |
| 10 | K | LED K |
TFT_eSPI library
Search the library in the platformIO library manager, and install it.
Configuration
The configuration is a little bit complex.
First, create a setup file, such as mysetup.h under the folder .pio\libdeps\esp32doit-devkit-v1\TFT_eSPI\.
mysetup.h
// ST7789 240 x 280 display with no chip select line
#define USER_SETUP_ID 24

#define ST7789_DRIVER // Configure all registers

#define TFT_WIDTH 240
#define TFT_HEIGHT 320

// #define TFT_RGB_ORDER TFT_RGB  // Colour order Red-Green-Blue
#define TFT_RGB_ORDER TFT_BGR // Colour order Blue-Green-Red

// #define TFT_INVERSION_ON
#define TFT_INVERSION_OFF

#define TFT_BACKLIGHT_ON HIGH // Level to turn ON back-light (HIGH or LOW)

// Generic ESP32 setup
// #define TFT_MISO 12 不需要
#define TFT_MOSI 13
#define TFT_SCLK 14
#define TFT_CS 15 //-1 Not connected
#define TFT_DC 26
#define TFT_RST 25 // Connect reset to ensure display initialises
#define TFT_BL 27  // LED back-light control pin

#define LOAD_GLCD   // Font 1. Original Adafruit 8 pixel font needs ~1820 bytes in FLASH
#define LOAD_FONT2  // Font 2. Small 16 pixel high font, needs ~3534 bytes in FLASH, 96 characters
#define LOAD_FONT4  // Font 4. Medium 26 pixel high font, needs ~5848 bytes in FLASH, 96 characters
#define LOAD_FONT6  // Font 6. Large 48 pixel font, needs ~2666 bytes in FLASH, only characters 1234567890:-.apm
#define LOAD_FONT7  // Font 7. 7 segment 48 pixel font, needs ~2438 bytes in FLASH, only characters 1234567890:.
#define LOAD_FONT8  // Font 8. Large 75 pixel font needs ~3256 bytes in FLASH, only characters 1234567890:-.
#define LOAD_FONT8N // Font 8. Alternative to Font 8 above, slightly narrower, so 3 digits fit a 160 pixel TFT
#define LOAD_GFXFF  // FreeFonts. Include access to the 48 Adafruit_GFX free fonts FF1 to FF48 and custom fonts

#define SMOOTH_FONT

// #define SPI_FREQUENCY 27000000
#define SPI_FREQUENCY 80000000
#define SPI_READ_FREQUENCY 20000000
#define SPI_TOUCH_FREQUENCY 2500000

// #define SUPPORT_TRANSACTIONS
Then modify the file User_Setup_Select.h to include the setup file. Comment the line #include <User_Setup.h> and add the line #include "mysetup.h".
// #include <User_Setup.h>
#include "mysetup.h"
So the configuration is done.
However, this way has a disadvantage. The configuration file will be lost if the library is updated or reinstall the library. So there is another way to configure the library.
Configure the library in PlatformIO Configuration File
The other way is to configure the library in the platformio.ini file.
[env:esp32doit-devkit-v1]
platform = espressif32
board = esp32doit-devkit-v1
framework = arduino
monitor_speed = 115200
lib_deps =
    bodmer/TFT_eSPI@^2.5.43
build_flags =
    -D USER_SETUP_LOADED=1
    -D ST7789_DRIVER=1
    -D TFT_WIDTH=240
    -D TFT_HEIGHT=320
    -D TFT_INVERSION_OFF=1
    -D TFT_MOSI=13
    -D TFT_SCLK=14
    -D TFT_CS=15
    -D TFT_DC=26
    -D TFT_RST=25
    -D TFT_BL=27
    -D LOAD_GLCD=1
    -D LOAD_FONT2=1
    -D LOAD_FONT4=1
    -D LOAD_FONT6=1
    -D LOAD_FONT7=1
    -D LOAD_FONT8=1
    -D LOAD_FONT8N=1
    -D LOAD_GFXFF=1
    -D SMOOTH_FONT=1
    -D SPI_FREQUENCY=80000000
Of cause, you can also modify the platformio.ini file as need base on the screen and the project.
Main file to test the screen
After setup the library, we can write a simple main file to test the screen.
#include <Arduino.h>

#include <TFT_eSPI.h> // Graphics and font library for ILI9341 driver chip
#include <SPI.h>

TFT_eSPI tft = TFT_eSPI(); // Invoke library

void setup()
{
  Serial.begin(115200);

  tft.init();
  tft.setRotation(3);
}

void loop()
{
  tft.fillScreen(TFT_BLUE);
  tft.setCursor(50, 50, 4);
  tft.setTextColor(TFT_WHITE);
  tft.println("Hello ESP32Cube!");
  delay(2000);
}
upload the code to the board, and the screen will show a blue background with the text "Hello ESP32Cube!".
Source code link: ESP32_UI_tutorial/Let01_TFT_eSPI at main · ESP32Cubes/ESP32_UI_tutorial (github.com)