Building a Powerful Network Alarm Clock with ESP8266 or ESP32
Introduction
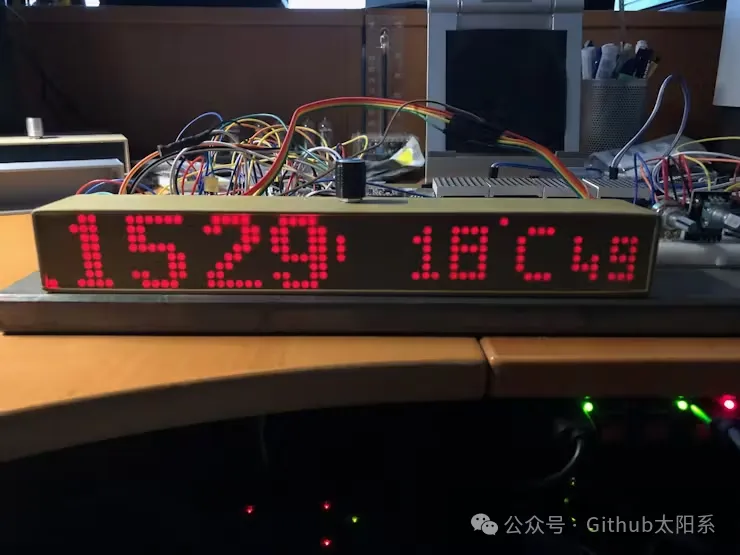
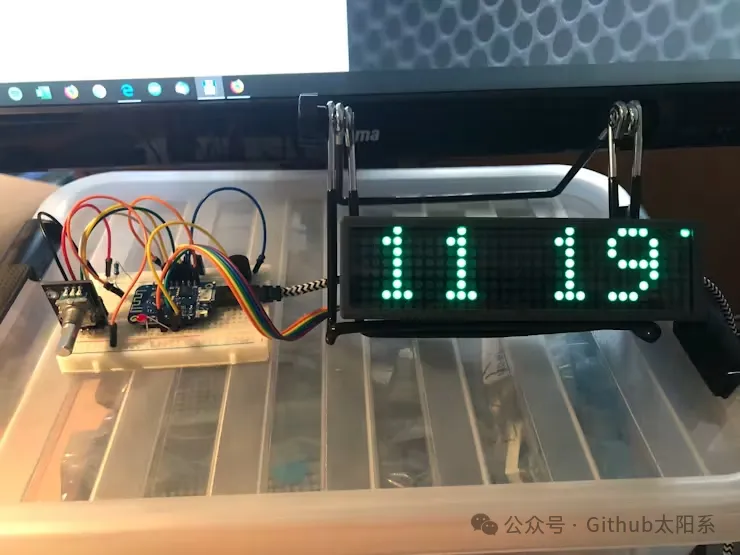
This open-source project demonstrates how to build a multifunctional smart alarm clock using ESP8266 or ESP32 microcontrollers, featuring a network interface, sunrise wake-up light, and temperature display.

The project will guide you step by step through the development process of implementing advanced features for the alarm clock using ESP8266 or ESP32, including web interface configuration, multiple (cyclic) alarms, triggers, and information display.

Hardware Preparation
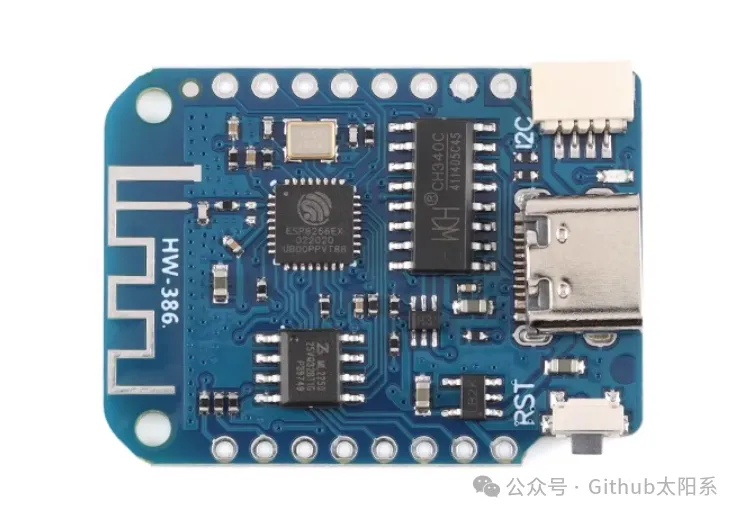
- Wemos D1 Mini or any ESP8266/ESP32 development board
- MAX7219 8x8 LED matrix module
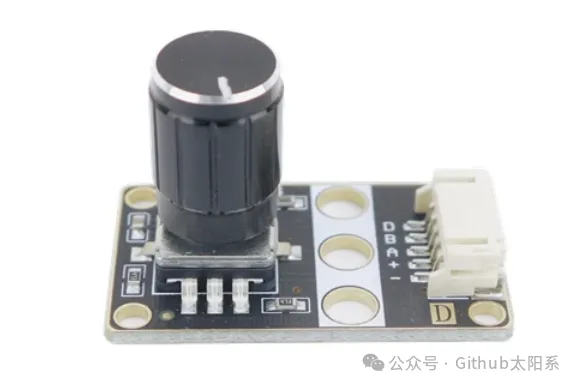
- Rotary encoder with buttons
- Buzzer
- Photocell (optional)
- PIR motion sensor (optional)
- NeoPixel LED strip or ring (optional)
- BME280 sensor (optional)

Software and Tools
- Arduino IDE
- ESPUI Library
- ArduinoJSON Library
- FastLED Library (for controlling NeoPixel)
Feature Highlights
- Support for ESP8266 and ESP32 development boards
- WiFi setup and time synchronization through a web interface
- Web interface for programming and modifying alarm settings
- Multiple alarm settings, with default support for 12
- Simulated sunrise with NeoPixel wake-up light function
- EEPROM storage that preserves settings after power loss
- Customizable message and duration for each alarm
- GPIO control upon alarm trigger to manage external devices
- Recurring alarms: repeat weekly, on weekdays, weekends, or custom intervals
- 5 time display modes, including AM/PM mode
- Support for OTA (Over-The-Air) updates
- BME280 sensor support for displaying temperature, humidity, and pressure
- Passive Infrared (PIR) sensor for motion detection with message and sound alerts
- Sleep mode and suspend mode for the display
- Customizable melodies, such as Big Ben, Avicii, etc.
- Photocell sensor support for adjusting LED brightness based on light levels
- Motion sensor support
Assembly Steps
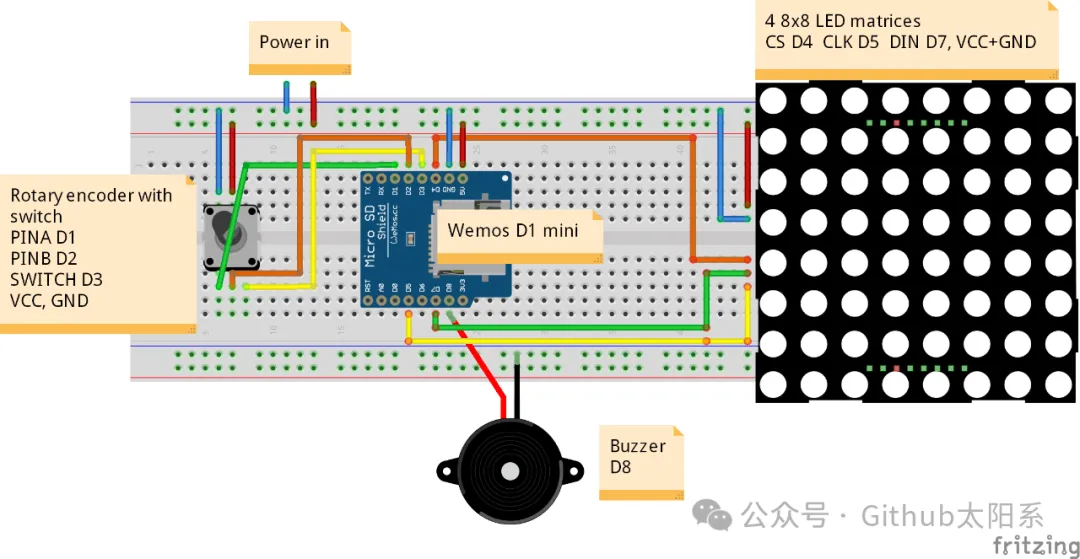
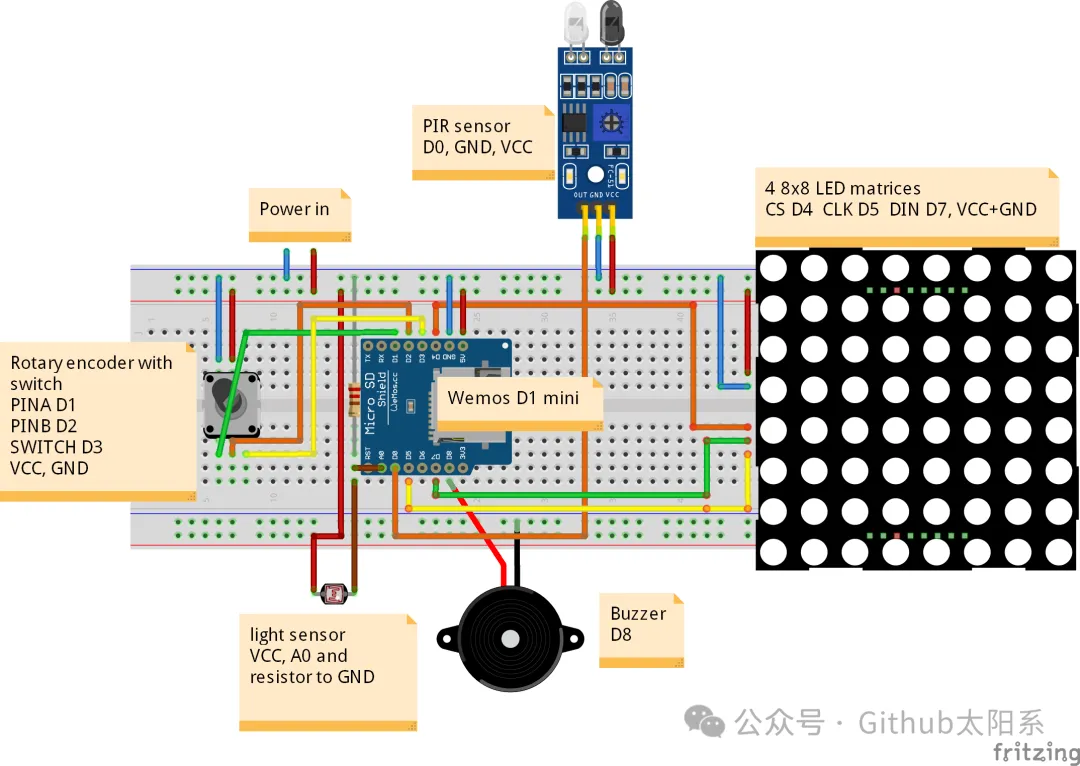
1. Hardware Connection
Firstly, connect all hardware components according to the provided schematic. This includes connecting the LED matrix module, rotary encoder, buzzer, and other sensors to the ESP32 development board.
2. Software Setup
Use the Arduino IDE to install the required library files and download the code ZIP file, ensuring all feature files and the main file are in the same folder so they can be opened as tabs in the IDE. The required open-source code addresses are:
3. Code Adjustment
Based on your own hardware setup, you will need to search for @EB-setup comments in the code to adjust the hardware pins and other settings. If you need to modify the default settings, you can search for @EB-custom comments.
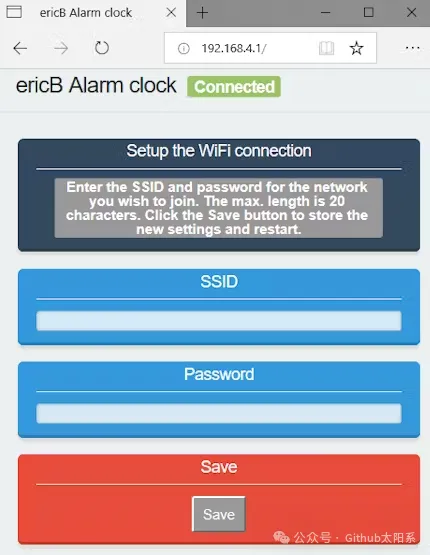
4. Network Interface Configuration
Upon startup, the alarm clock will attempt to read the WiFi configuration from the EEPROM and connect to the network. If there are no stored settings, or if the network name or password has changed, it will create a hotspot for you to enter new settings, which will then be saved to the EEPROM.
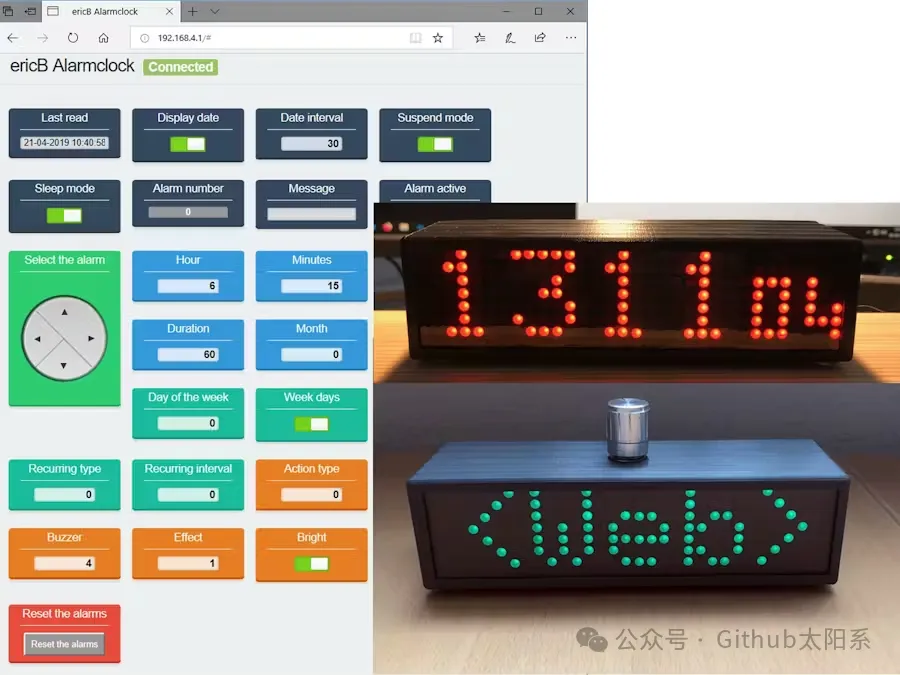
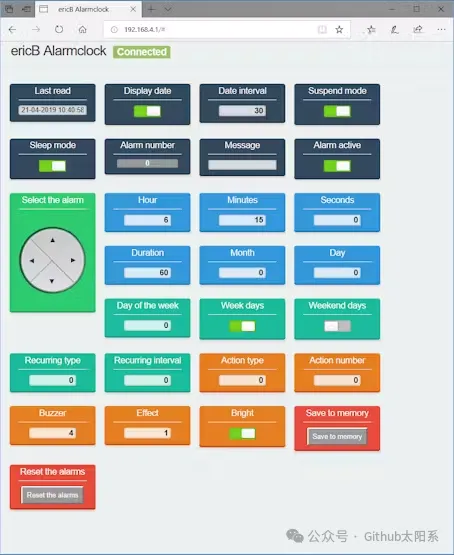
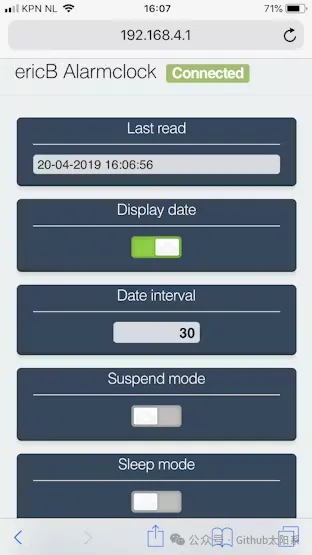
5. Web Interface Usage
After connecting to the network created by the ESP32, you can access the web interface to configure the alarm clock, including setting the time, alarms, display modes, etc.
Debugging and Testing
Once your hardware and software are ready, ensure thorough testing to verify all functions of the alarm clock. Check the network connection, responsiveness of the web interface, accuracy of sensor readings, and reliability of the alarm functions.
Conclusion
Through this tutorial, you will not only be able to create a multifunctional smart alarm clock but also learn the basics of ESP32, including hardware interfaces, network programming, and sensor integration. This project is not only an interesting DIY activity but also brings convenience and fun to your daily life.
Project code: Baidu Pan Link