How to Use ESP32 and WS2812B to Create Stunning LED Displays
How to Use ESP32 and WS2812B to Create Stunning LED Displays
Hey there! You know how when you're learning to work with hardware, the first thing you usually do is make an LED blink? It's a fun and simple way to get the basics down. But let's be real, blinking a single LED in one color gets old pretty quickly. So why not take it up a notch? Enter WS2812B LEDs!
These little gems can light up in multiple colors and create amazing lighting effects. Ready to dive in? Let's do it!
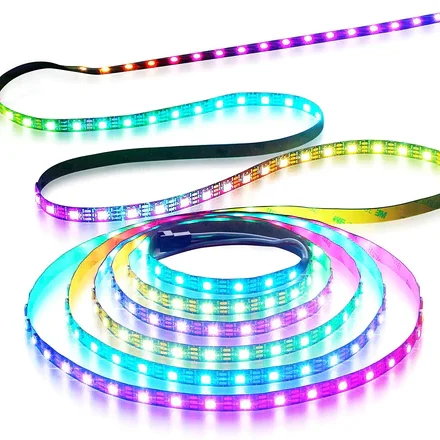
The Magic of WS2812B LEDs
WS2812B LEDs, also known as NeoPixels, are super cool because each one is individually addressable. This means you can control each LED separately to display any color you want. Here’s why they're awesome:
- Individually Addressable: Control each LED independently for stunning patterns and animations.
- Rich Color Range: With 16 million colors, the possibilities are endless.
- Chainable: Easily connect multiple LEDs in a series for expansive designs.
- Simple Wiring: Just three wires—power, ground, and data—make the setup straightforward.
Controlling WS2812B LEDs with ESP32
The ESP32 is like the superhero of microcontrollers. It's got Wi-Fi, Bluetooth, and plenty of processing power, making it perfect for controlling WS2812B LEDs.
What You Need:
- ESP32 Development Board
- WS2812B chip or LED Strip
- Power Supply (5V)
- Breadboard and Jumper Wires (optional for prototyping)
- Resistor (330 ohms)
- Capacitor (1000 µF, 6.3V or higher)
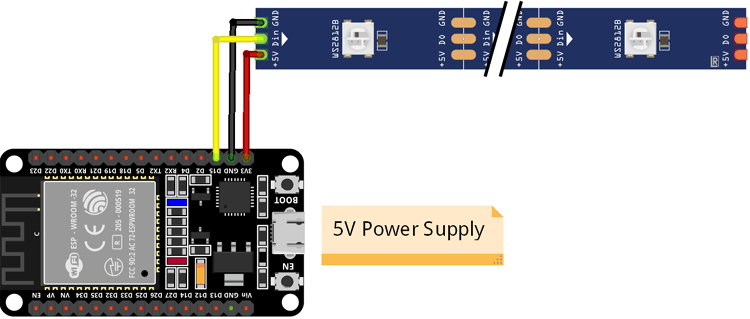
Setting It All Up
Here's a simple wiring diagram to get you started with your ESP32 and WS2812B LED strip:
- Power Supply: Connect the positive terminal of the power supply to the 5V pin on the WS2812B strip and the 5V pin on the ESP32. Connect the negative terminal of the power supply to the GND pin on both the WS2812B strip and the ESP32.
- Data Line: Connect the data input pin (DIN) of the WS2812B strip to a digital output pin on the ESP32 (e.g., GPIO 13).
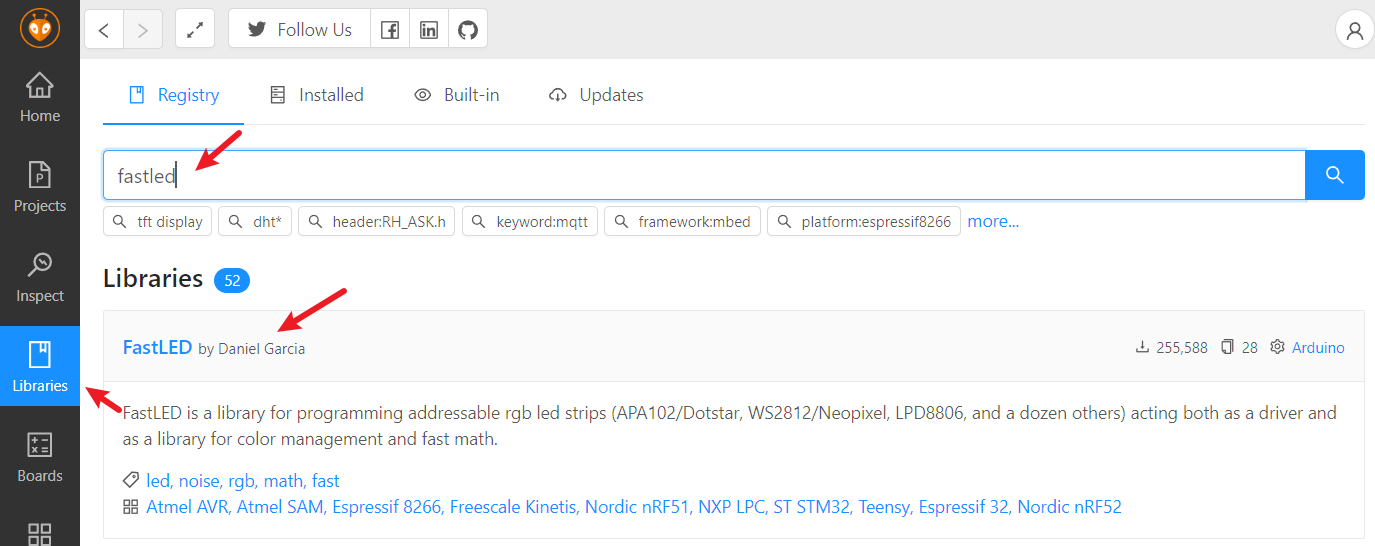
Install the FastLED Library
To control the WS2812B LEDs, we’ll use the FastLED library. First, you need to install the FastLED library in your PlatformIO project. You can do this by adding the following line to your platformio.ini file under the lib_deps section it will automatically download the library for you when you build the project.
lib_deps =
    FastLED
Or you can search for FastLED in the PlatformIO library manager and install it from there.
Example Code
Here’s an example to get you started:
#include <FastLED.h>

#define LED_PIN     13
#define NUM_LEDS    5
#define BRIGHTNESS  64
#define LED_TYPE    WS2812B
#define COLOR_ORDER GRB
CRGB leds[NUM_LEDS];

void setup() {
    // Tell FastLED about the LED strip configuration
    FastLED.addLeds<LED_TYPE, LED_PIN, COLOR_ORDER>(leds, NUM_LEDS).setCorrection(TypicalLEDStrip);
    FastLED.setBrightness(BRIGHTNESS);
}

void loop() {
    // Fill the LED array with a rainbow pattern
    fill_rainbow(leds, NUM_LEDS, 0, 7);
    // Display the updated LED colors
    FastLED.show();
    // Pause for a moment before the next update
    delay(100);
}
This code sets up a strip of 30 WS2812B LEDs connected to GPIO 13 on the ESP32. It creates a rainbow effect that continuously updates every 100 milliseconds.
Wrapping Up
With the ESP32 and WS2812B LEDs, the possibilities for creative lighting projects are virtually endless. From simple color patterns to intricate animations, these components offer a powerful yet accessible platform for DIY enthusiasts and professionals alike. So, grab your ESP32, fire up your Arduino IDE, and start bringing your LED projects to life!
Next time we will discuss how to design a PCB with WS2812B LEDs, then you can use one LED to indicate different states of your product. Stay tuned!
Got questions or want to share your projects? Drop a comment below. Happy tinkering!